
Case Study Summary
- Client: Sandra, owner of an architecture firm in Tasmania.
- Device: 4-drive RAID 5 array of Seagate IronWolf 4TB SATA hard drives.
- Problem: Two of four drives failed with suspected physical damage. Array held .dwg drawings, PDFs, and .las point cloud files from 3D laser scanning. Nothing had been attempted by the IT department yet.
- Solution: Tested all four drives on Atola Insight Forensic. Dmitri performed a head swap on the least damaged of the two failed drives. The repaired drive was then cloned to 99 percent on a DeepSpar Disk Imager. The RAID 5 was rebuilt manually in UFS Explorer using two original healthy drives plus the clone.
- Outcome: Full data set recovered including all .las point cloud files. Urgent files via Google Drive immediately, full external HDD shipped via Express Post within roughly 2 days at no extra charge.
- Service Page: RAID and Server Data Recovery
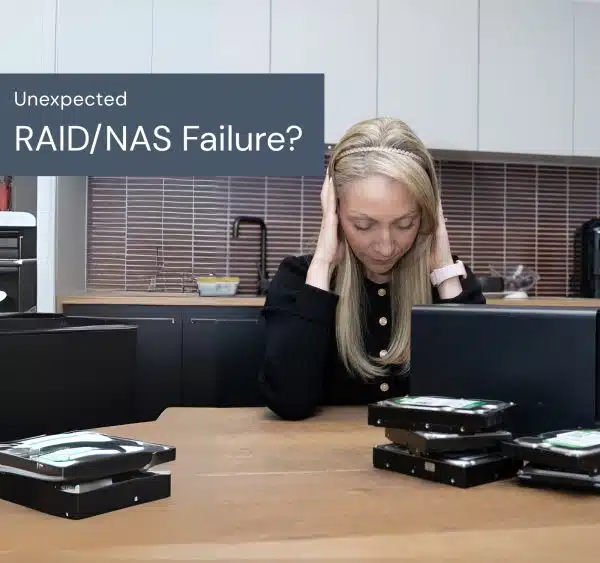
RAID 5 Head Swap Recovery: A Tasmania Architecture Firm’s Array Lands at the Rhodes Lab
Sandra runs an architecture firm in Tasmania. Her 4-drive RAID 5 array of Seagate IronWolf 4TB drives held the kind of files that don’t have an easy backup to fall back on: project archives with .dwg drawings and PDF deliverables, plus a scans folder full of .las point cloud files generated from 3D laser scanning of building sites. Her IT department diagnosed two of the four drives as failed with suspected physical hardware damage and stopped there. Sandra needed the data back as quickly and as cheaply as the recovery would allow. The drives travelled from Tasmania to Payam Data Recovery’s lab in Rhodes, New South Wales, where owner Payam Toloo took the case on. This RAID 5 head swap recovery case study walks through the head swap on the worst of the two failed drives, the 99 percent clone on DeepSpar, the manual parameter discovery in UFS Explorer after auto-detection failed, and the full data return inside a few days. If you’re looking for the matching service, see our RAID and server data recovery service.
The Problem: Two Failed Drives in a 4-Drive RAID 5
Bench testing on Atola Insight Forensic confirmed what Sandra’s IT department had reported. Two of the four IronWolf drives came up clean. The other two had failed with very different symptoms.
The first failed drive stayed busy on the imager but sounded healthy from the outside: no clicking, no grinding, no abnormal mechanical noises. Just a drive that wasn’t getting through its own initialisation. That’s the kind of failure that doesn’t announce itself. The drive’s firmware is hung waiting on something the heads or the platters are no longer giving it back cleanly.
The second failed drive made it obvious. Loud clicking and grinding sounds the moment power was applied. That’s the unmistakable signature of damaged read/write heads. RAID 5 head swap recovery exists almost entirely for this exact symptom: when the heads in a drive are gone, no amount of software effort will read the platters underneath them. The damaged heads have to be physically replaced with matching donor heads from a compatible drive in a Class 100 cleanroom.
A 4-drive RAID 5 with two failed drives sits at the edge of what RAID 5 was designed to survive. RAID 5 tolerates exactly one drive failure. Two failures and the array is mathematically unrecoverable from parity alone. The only path to a recovery is to physically repair at least one of the failed drives so that three readable drives become available again. That was the goal here, and it had to be done without knowing which of the two drives failed first.
Sandra also asked for the recovery to be approached cheaply, so the plan was to repair the easiest of the two failed drives first, attempt a rebuild with that one and the two healthy ones, and only escalate to repairing the second failed drive if the rebuild didn’t produce clean data.
The RAID 5 Head Swap Recovery Process
Step one of the RAID 5 head swap recovery was to hand the two failed drives over to Dmitri, the lab’s specialist for physical drive work. Dmitri assessed both drives and selected the busy-but-quiet one as the better candidate for the head swap. Loud clicking drives can sometimes have additional platter damage from the heads scraping the surface, which makes the donor head transplant succeed but the resulting reads still patchy. The quieter failed drive was the safer first attempt.
The head swap itself happens in a Class 100 cleanroom. Particulate contamination is the enemy: a single dust particle on a platter is larger than the head’s flying height and will gouge a permanent track if power is restored before the contamination is cleared.
A donor drive with matching firmware revision and matching head architecture is sourced first. The donor’s head stack is removed, the failed drive’s head stack is removed, and the donor’s heads are installed onto the failed drive’s chassis using head-comb tooling that holds the heads in their parked position so they don’t snap together when they meet a fresh platter.
Once the head swap was complete, the drive was reinstalled on Payam’s bench and connected to a DeepSpar Disk Imager. Eight hours later the clone reached 99 percent. The remaining 1 percent was the kind of stubborn weak sectors that can be expected after a recent head swap, and the missing percent didn’t include any active data area as a later cross-check confirmed.
Step two of the RAID 5 head swap recovery was the rebuild. Three working drives were now available: the two original healthy IronWolf drives, and the 99 percent clone of the repaired drive. They were connected to the RAID recovery workstation and confirmed in Windows Device Manager. WinHex was used first to compare the same sectors across all three drives. That comparison reveals the data layout: which drive holds the data block, which drive holds the rotating parity, what the stripe size is, what the rotation order is.
Step three nearly stopped the job. Three different RAID recovery programs were run against the drive set: NAS Data Recovery, ReclaiMe, and UFS Explorer. None could detect the RAID configuration cleanly. Auto-detection works on most arrays. It doesn’t work on every one. Payam stepped back, rechecked every drive against his labels, compared the WinHex sector readings, and went back to UFS Explorer to adjust the configuration manually: stripe size, drive order, parity rotation direction, parity start offset. After several attempts, the parameters lined up. A partition appeared. The file system became visible.
RAID 5 Head Swap Recovery Results
The verification step on any RAID 5 head swap recovery is to test files larger than the combined RAID stripe size. A small file fits inside one stripe block on one drive, so it’ll open cleanly even if the rebuild parameters are slightly off. A file larger than the combined stripe size has to be reassembled across multiple drives in the correct order using the parity. If any parameter is wrong, the file will be corrupted in a way that’s immediately visible.
For Sandra’s array the threshold worked out at 1.5 MB. Several large PDFs were tested. Each one opened cleanly with no corruption, no missing pages, no rendering errors. That confirmed the manual RAID configuration was correct.
The full data set was copied to a new external hard drive Sandra purchased. The most urgent files (the .las point cloud scans she needed for an active project) were uploaded to a Google Drive link and shared immediately so she didn’t have to wait on shipping. The full external HDD was shipped back to Tasmania via Express Post within roughly two business days, at no extra charge, alongside a complete file listing and a video preview.
Total RAID 5 head swap recovery: every project archive, every .dwg, every PDF, every .las point cloud file. Nothing was missing.
Why Professional RAID 5 Head Swap Recovery Matters
Three things make a case like this dangerous in the wrong hands. First, the head swap itself. A donor drive has to match the failed drive’s family, capacity, firmware revision, and head architecture. The wrong donor will mount but produce garbage reads. The right donor in the wrong cleanroom conditions will gouge the platters during the swap. RAID 5 head swap recovery is a Class 100 cleanroom job, full stop.
Second, the rebuild parameters. RAID 5 has stripe size, drive order, parity rotation direction, and parity start offset. Get any one of those wrong and the partition either won’t appear at all, or it’ll appear and contain corrupt files. A standard IT shop without a hex editor and without recovery experience will run an auto-detector, get nothing, and conclude the array is unrecoverable. The data is right there.
Third, the order matters. A common mistake is to attempt a software RAID rebuild before the failed drive is physically repaired. Trying to read a clicking drive in software puts mechanical stress on already-damaged heads and can drive the platter damage past the point where a head swap can recover anything. Physical repair first, then clone, then rebuild on the clones. Always.
For background on how RAID 5 parity works, the Wikipedia article on standard RAID levels covers the parity rotation model. For more on the physical structure of a hard drive, the Wikipedia article on hard disk drives explains the head, actuator, and platter geometry. Successful RAID 5 head swap recovery on a 2-drive failure depends on getting both layers right.
RAID 5 Head Swap Recovery Service Tiers
RAID jobs are quoted after a free assessment, because the work depends on the number of drives, the RAID level, the file system on top, and whether any drives need head-swap or component-level repair. Three RAID 5 head swap recovery turnaround tiers are available so customers can pick what fits their situation:
Economy. The right RAID 5 head swap recovery choice if you are working to a tight budget. Economy RAID jobs typically start from around $1,000 and run up to about $5,000 depending on drive count and complexity. Turnaround is 5 to 10 business days.
Priority. A faster RAID 5 head swap recovery path through the lab for jobs where waiting a week and a half isn’t realistic. Turnaround is 2 to 4 business days. Pricing is quoted on the free assessment.
Emergency. Round-the-clock RAID 5 head swap recovery work for cases where a business is offline or a project deadline is at risk. Turnaround is typically 24 to 72 hours, including overnight and weekend work. Pricing is quoted on the free assessment.
For RAID jobs with one or more drives needing physical repair (head swap, motor swap, PCB repair), an attempt fee of $500 applies. The attempt fee is part of the total quoted price, not added on top, and it covers donor drive sourcing and cleanroom work whether the repair succeeds or fails. We always provide a free assessment first.
Because every step happens in house in Australia, there are no overseas handoffs and no waiting on a third-party lab to schedule your job.
Frequently Asked Questions About RAID 5 Head Swap Recovery
Q: My RAID 5 has two failed drives. Is the data gone?
Not necessarily. RAID 5 mathematically tolerates one drive failure from parity alone, but a 2-drive failure is recoverable if at least one of the failed drives can be physically repaired (typically with a head swap) so that three readable drives become available for the rebuild. Sandra’s case ran exactly that path: head swap on one of the two failed drives, 99 percent clone on DeepSpar, manual rebuild in UFS Explorer using the clone plus the two original healthy drives. Full data set recovered.
Q: What is a head swap, and when is it needed?
A head swap is the physical replacement of a hard drive’s read/write head stack with a matching donor stack from a compatible drive. It’s required when the original heads have failed (signalled by clicking, grinding, or buzzing sounds when power is applied) and is performed in a Class 100 cleanroom to prevent particulate contamination of the platters. After the head swap, the drive is cloned sector by sector on a DeepSpar Disk Imager so all subsequent recovery work happens on a stable copy.
Q: Why do RAID recovery programs sometimes fail to auto-detect the array?
Auto-detection works by sampling sector patterns across the drives and matching them against known RAID layouts. It works on most arrays. It doesn’t work when the file system is unusual, the parity rotation is non-standard, the stripe size doesn’t match heuristics, or one of the drives is a clone with a small percentage of unreadable sectors that bias the pattern matching. When auto-detection fails, manual parameter discovery in a hex-aware tool like UFS Explorer or WinHex is the next step.
Q: Can you recover .las point cloud files from a failed RAID?
Yes. Point cloud files are large binary files that the file system treats no differently from any other large file. Once the RAID 5 is correctly rebuilt and the file system is mounted on the rebuild, .las files come off intact alongside everything else. The verification test we use (opening files larger than the combined RAID stripe size) confirms whether large binary files are reassembling correctly.
Q: How long does RAID 5 head swap recovery take?
Sandra’s 4-drive Tasmania case closed within a few days end to end. Standard turnarounds run 5 to 10 business days for Economy and 2 to 4 business days for Priority. Cases requiring head swaps add time because donor drive sourcing, the cleanroom swap itself, and the cloning step (typically 8 hours per drive) all happen before the rebuild can begin.
Q: I am working to a tight budget. Can you still help with a RAID 5 recovery?
Yes. Sandra explicitly asked for the recovery to be approached cheaply, and the lab structured the work to match: repair the easiest of the two failed drives first, attempt the rebuild on three drives, and only escalate to repairing the second failed drive if needed. It didn’t need that escalation. Economy RAID jobs typically start from around $1,000 with the price confirmed in writing after a free assessment.
Q: My business is offline and I need this back today. Can you do that?
That’s what the Emergency tier is for. Our team works 24/7 on Emergency cases, with typical turnaround of 24 to 72 hours. RAID jobs with head swaps run a little longer than purely logical jobs because of the cleanroom and cloning steps, but if you have a business-critical deadline we can prioritise donor sourcing and cleanroom work to compress the timeline.
Q: I’m not based in Australia. How does shipping and customs work?
Start with our free quote form so you can see whether the indicative pricing fits your budget. If it does, fill out the submit-a-job form to receive a job number and delivery instructions, then ship the drives in via a trusted international courier (FedEx, DHL, or UPS work well). On the customs declaration, the items should be declared as faulty hardware for repair with a very low declared value. The drives aren’t being sold or bought, they are faulty for repair, so a low value is accurate and avoids unjustified customs duties or import taxes. We organise return shipping at the end of the job and, if you need anything urgently before the physical drive lands back with you, we can upload critical files to Google Drive or another cloud service of your choice.
Q: What should I do right now if my RAID 5 has multiple failed drives?
Power the unit down. Don’t run any rebuild from the controller. Don’t replace any drive into the original bay. Don’t attempt a chkdsk or fsck pass. Each rebuild attempt against a degraded RAID 5 with a clicking drive risks driving that drive past the point where a head swap can recover it. Label each drive with its bay number, place them in anti-static bags, and ship them or drop them at a Payam lab.
About Payam Data Recovery
Payam Data Recovery is an Australian company, in business since 1998, with more than 150,000 successful recoveries to date including hundreds of RAID 5 head swap recovery jobs. Every recovery happens in our own labs in Sydney, Rhodes (where Sandra’s case was handled), Melbourne and Brisbane, with drop-off points in Adelaide and Perth and free shipping both ways inside Australia, including from Tasmania. Our equipment includes Ace Lab PC-3000, DeepSpar Disk Imager, Atola Insight Forensic, HDD Surgery head-comb tooling, and UFS Explorer Professional Recovery, plus a Class 100 cleanroom for head swaps and other physical drive work. Nothing is ever outsourced. The team that opens the assessment is the same team that finishes the recovery, start to finish, which is what makes Emergency turnarounds possible. We regularly take international cases referred by managed IT service providers, IT managers, and other data recovery companies from around the world. Visit our homepage or read more about our RAID and server data recovery service.
Request a Free RAID 5 Head Swap Recovery Assessment
RAID 5 with two failed drives, clicking drives in a NAS, RAID 6 array showing no file system, or a RAID where auto-detection won’t match the parameters? Our RAID 5 head swap recovery team can help.
On a tight budget? Our Economy RAID 5 head swap recovery service handles jobs from around $1,000, with the full quote confirmed after a free assessment.
Need it back fast? Priority and Emergency RAID 5 head swap recovery tiers are built for urgent cases. Because every step is done in house by our own Australian team, there is no waiting on a third-party lab and no overseas handoffs slowing things down. Emergency jobs run 24/7 for the fastest turnaround humanly possible.
We cover: All RAID levels (0, 1, 5, 6, 10, 0+1, 50, 60), all NAS brands (QNAP, Synology, WD, Netgear, Buffalo, Asustor, Drobo, TrueNAS), Windows Server arrays, VMware and Hyper-V virtual disks, and custom Linux mdadm and ZFS arrays. Head swaps and component-level drive repair on every major hard drive brand.
Australian RAID 5 head swap recovery, international clients welcome. Managed IT service providers, IT managers, and other data recovery companies from around the world send us cases regularly. Start with a free quote, then ship in via FedEx, DHL, or UPS once the indicative price works for you. We can return the drive anywhere in the world and upload urgent files to Google Drive or another cloud service if you need them before the physical drive arrives.
RAID and Server Recovery Service
Get a Free Quote
Or submit a new job online once you have an indicative quote.
Phone: 1300 444 800 | Email: help@payam.com.au
Related RAID and NAS Recovery Case Studies
- RAID 5 dual drive failure recovery in Sydney
- Synology NAS RAID 5 data recovery case study
- Seagate Personal Cloud NAS recovery case study
Video Transcript (click to expand)
Hi, it’s Mike, and today I’m visiting Payam Data Recovery’s lab in Rhodes, New South Wales, to see how they handle a complex RAID 5 recovery. I’m meeting with the owner, Payam Toloo, who’s working on a critical case for Sandra, who runs an architecture company in Tasmania. Her IT department diagnosed that two of her four Seagate IronWolf 4TB SATA drives had failed with suspected physical hardware damage. The drives contained critical project archives with .dwg and PDF files, but most importantly, a scans folder with very large .las point cloud files from 3D laser scanning, the highest priority data. Nothing had been attempted yet.
Payam tested all four drives in his Atola Insight Forensic Unit. Two drives were completely healthy, but the other two had failed with different symptoms. One was staying busy but sounded healthy. The other was making loud clicking and grinding sounds: two failed drives with damaged read/write heads. It’s a very common problem with RAID 5 arrays that stop working. Payam wasn’t sure what order the drives failed in or if he could rebuild the RAID with just one repaired drive, so his goal was to recover the data as cheaply and quickly as possible for Sandra.
Payam passed the two failed drives to his colleague, Dmitri, who performed a head swap on the least damaged drive first. After the repair, Payam cloned it using his DeepSpar Disk Imager, achieving a 99 percent clone. Now he had three working clones of the original four drives. He connected them to his RAID recovery computer, confirmed they were all detected in Windows Device Manager, then used WinHex to compare the same sectors across all three drives to understand the data pattern before proceeding.
Now came the tricky part: working out the RAID 5 settings. Payam tried multiple RAID recovery programs, including NAS Data Recovery, ReclaiMe, and UFS Explorer. None could automatically detect the RAID or work out the settings. This is where experience matters. Payam didn’t give up. He rechecked all the drives, compared his clones and labels, and looked for mistakes. He went back to UFS Explorer and started changing configuration settings. Success. A partition appeared and files became visible.
Payam explained the best way to test RAID data is to pick files larger than the combined RAID stripe size across the drives. In this case, files over 1.5 megabytes. If those work, all other data should work. He tested several large PDFs. Perfect. No corruption.
Payam saved all the data to a new external hard drive Sandra purchased. The urgent files needed immediately, Payam shared them via Google Drive link. The full hard drive would be shipped back via Express Post in about two days at no extra charge, along with a complete file listing and video preview. This case shows that with the right experience and skills, RAID 5 can be rebuilt with one drive missing. Payam always considers the client’s budget, doing the work faster and smarter to pass cost savings to clients. Sandra’s architecture firm got all their critical .las point cloud files and project archives back safely.